ʻŌlena for flavor, health, beauty, and hula!

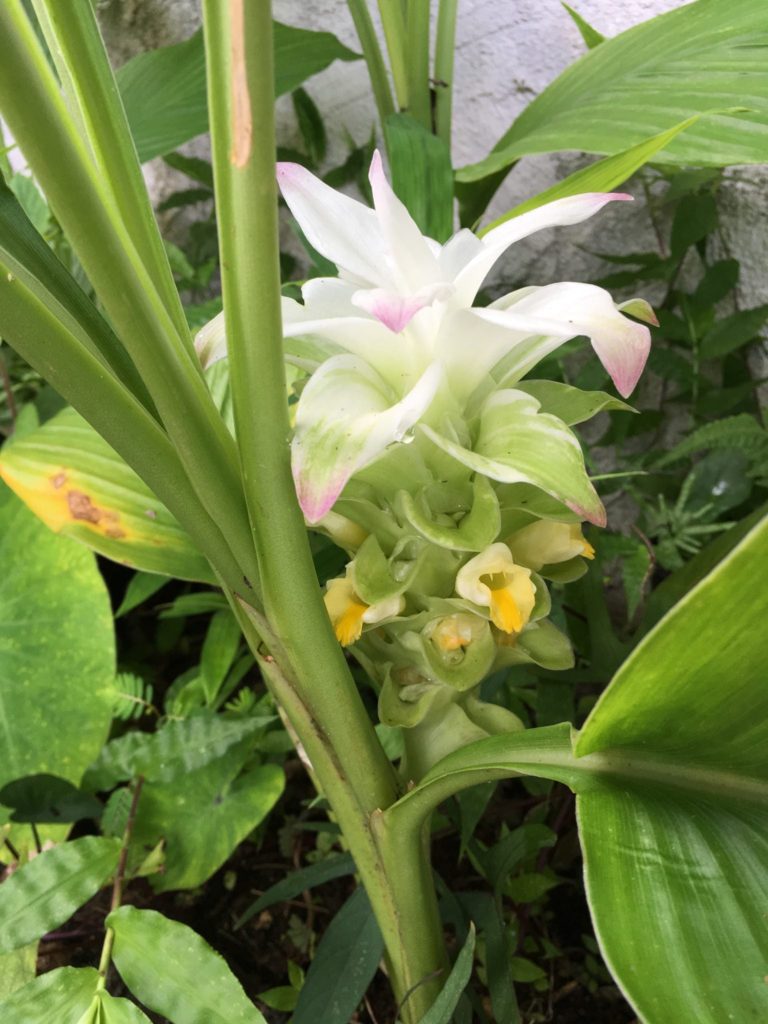
illustration of turmeric, olena
The ʻōlena blossom, famed in Hawaiian song and hula.

ʻŌlena, (turmeric, Curcuma longa) is both a Hawaiian kanu (cultivated) plant and a Hawaiian canoe (brought by the early Polynesian settlers) plant. It is a member of the ginger (Zingiberaceae) family.

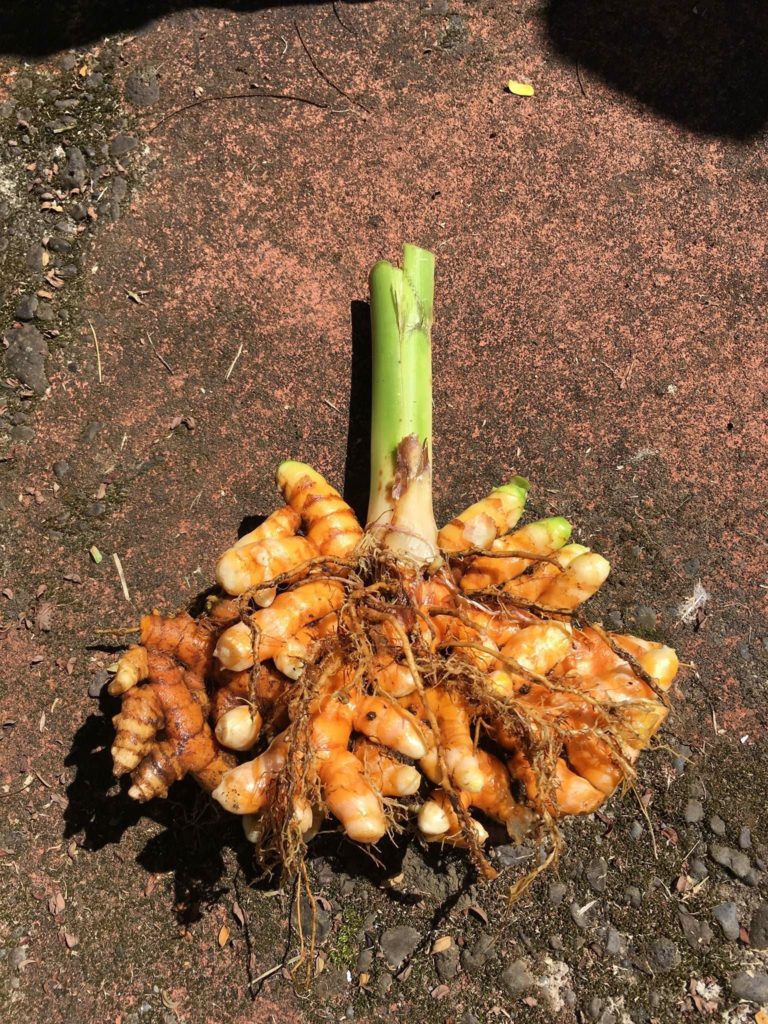
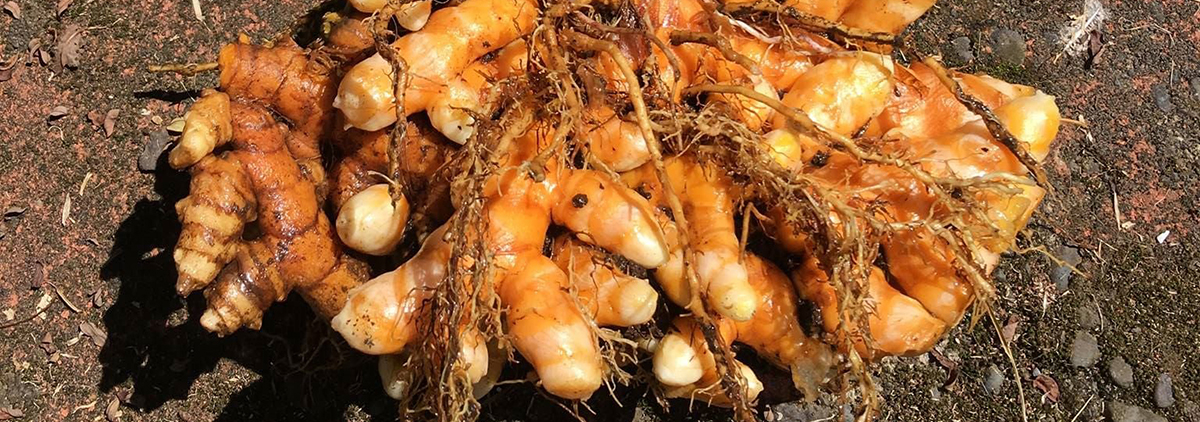
Freshly harvested ʻōlena.

The rhizome is used in cooking as a spice, in medicine as an anti-inflammatory, and in ceremony. While it does give a deep yellow color to food, it is unrelated to saffron, which comes from the saffron crocus (Crocus sativus). Aficionados of the hula may know of it through the mele Pua ʻŌlena.

The flavor is warm and, to some people, mildly bitter.

ʻŌlena is used in Hawaiian ceremony, in traditional Hawaiian medicine, and in food.

Seven ʻOno Ways to Prepare ʻUlu (Breadfruit)

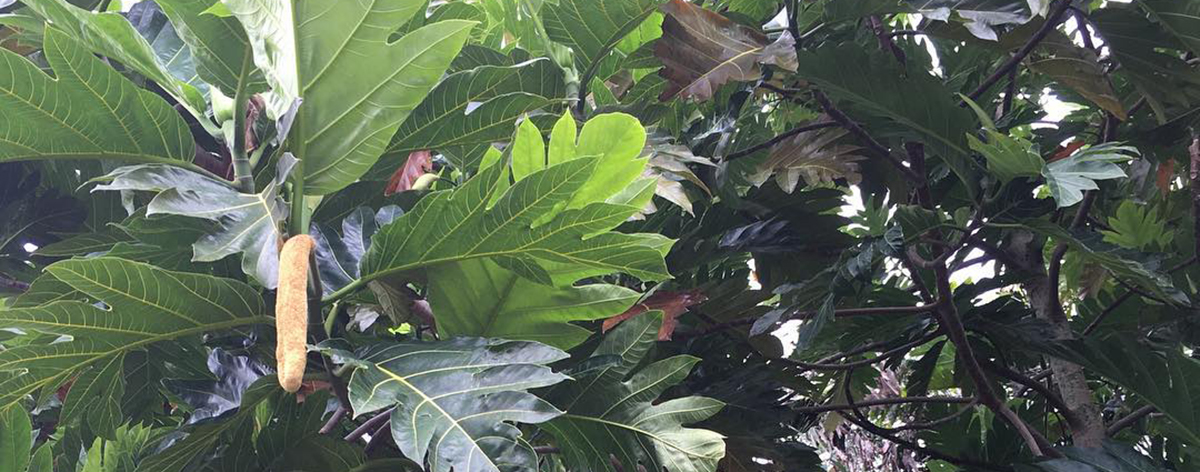
Leaves and male blossom of the breadfruit tree

Bake or boil until a chopstick goes all the way through. Cut in half, remove the core. Peel.  How to boil without getting latex on your pots.

1) Now you can cut it into slices and make fritters, or you can make it au gratin, or add to stew.

2) Use it to replace potatoes in chowder, fry it in butter, or cook pretty much any way you would cook a potato. 

3) And, of course, you can always Mash it for ʻulu poi. 

4) I also like it prepared with fish, sort of like a casserole. Make a layer of ʻulu in the bottom of a baking dish. Pour coconut milk over the bread fruit, and add a layer of fish. Put coconut milk over that. Bake in a slow oven until the fish is almost like jelly and the ʻulu is super soft.

If it is soft already it is good for dessert: 

5) Scoop the flesh into a mixing bowl. Use a pair of forks to shred and form the ʻulu into 1″ balls. Deep fry until the outside is deep gold and crispy. Roll immediately in sugar and let cool as desired. These will re-heat nicely in the microwave.

6) If you cannot deep-fry, flatten the balls into little patties and fry in butter in a skillet.

Another dessert:

7) Cut the soft ʻulu in half, removing the core. Fill core with a 50/50 mix of butter and honey. Put the two halves back together, wrapping tightly with aluminum foil. Place in a baking dish and bake in a slow oven an hour or more – until the sugars start to caramelize. Serve hot in bowls with butter, ice cream, or cream.

How to Keep Pots Clean when Cooking ʻUlu

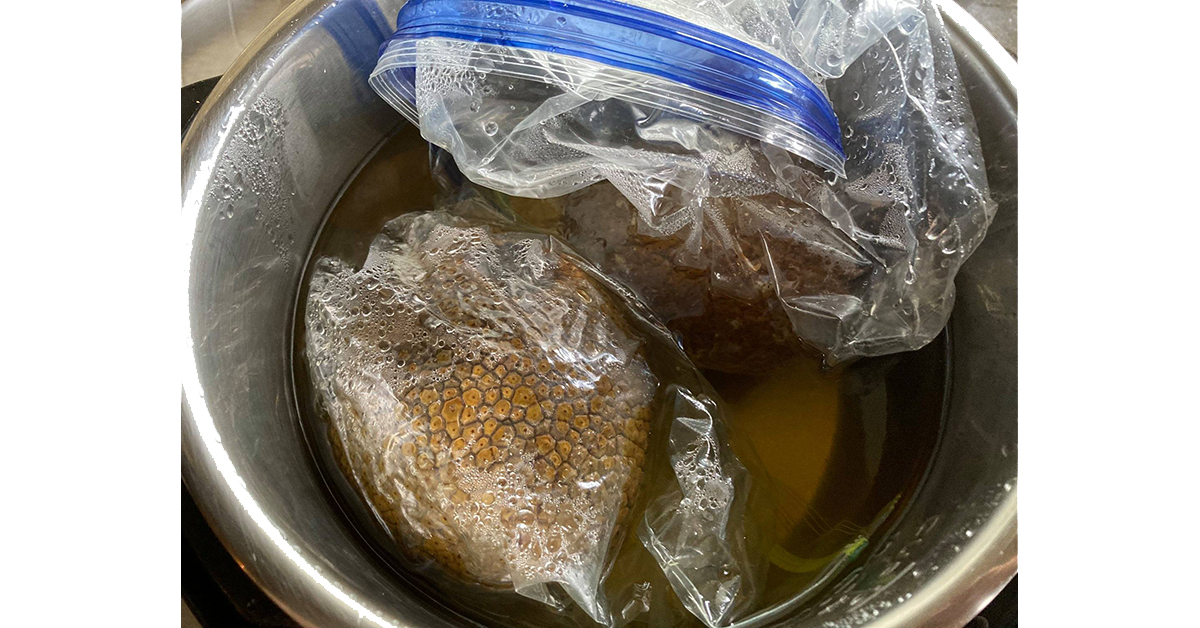
Image showing how to cook ʻulu

One of the problems with cooking ʻulu (breadfruit) is that latex gluing itself to your pot. To prevent that, I save my old re-sealable bags that are no longer freezer-worthy and use them for cooking ʻulu, uala, and kalo. The food gets cooked, the bags get an extra use before being tossed, and my pots stay clean.

If the recipe calls for peeled but not cooked ʻulu, I will cook it just a little while like this so that the skin is cooked, but the flesh is not. That lets me easily peel the skin—formerly one of my least favorite tasks.

Insider Perspective – Kalo is beautiful as well as delicious!

Image showing kalo growing

Insider perspective. ❤
Harvesting lau at my Dad’s hale. I was entranced by the light shining through the green leaves onto the red hā. It was like the light in a cathedral.

Did you know you can can hā and lūʻau/taro leaf? Cook and drain, then pack your canning jars. Cover with water, leaving an inch of headspace. I can in quarts at 15 pounds for 90 minutes.

Be sure to adjust your time for altitude and size of jar. When in doubt, use the longer time. Your local home extension service usually will have a website with times and pressures for your area.

https://nchfp.uga.edu/…/ensuring_safe_canned_foods.html

How to make “Old School” Haam Ning Mung

Illustration of t-shirt for sale

Love the T-shirt? Click here! Your purchase helps support this website!

Here are the instructions for Haam Ning Mung, Chinese Salt Lemon, as I learned from my grandmother:

Collect a bunch of limes (or lemons) and scrub well. Place a layer of them in a large glass jar. Add enough rock salt to just cover. repeat the layers of salt and lemon until the jar is full. Put on the lid. A plastic lid is best.

Place the jar on the roof of your carport or other accessible sunny place that the cats won’t knock it off. (It’s heavy, but they will try!)

Let sit all summer. Bring inside if you get snow. They will be useable in 6-12 months of sunshine. They are better after 2-3 years. There is no upper age limit. They just keep getting better.

In addition to seasoning certain dishes (they may be listed in ingredients as Velvet Lemon) and as a snack, they are use as a sore throat remedy. Simply suck on a small piece of the peel to stimulate salivation and ease sore throat. It also helps replace electrolytes lost due to illness.

If you keep it a long time, eventually you will have a lot of juice in the bottom of the jar. This can be used as a glaze on duck, as sore throat syrup, etc.

Hawaiʻi variations:

* Add li hing mui powder before setting to ferment

* Add licorice football before setting to ferment

* Cut lemons/limes in half and squeeze, reserve the juice for other things. Put a spoonful of sugar inside each half, then pack in jar as normal.

How to cool food quickly

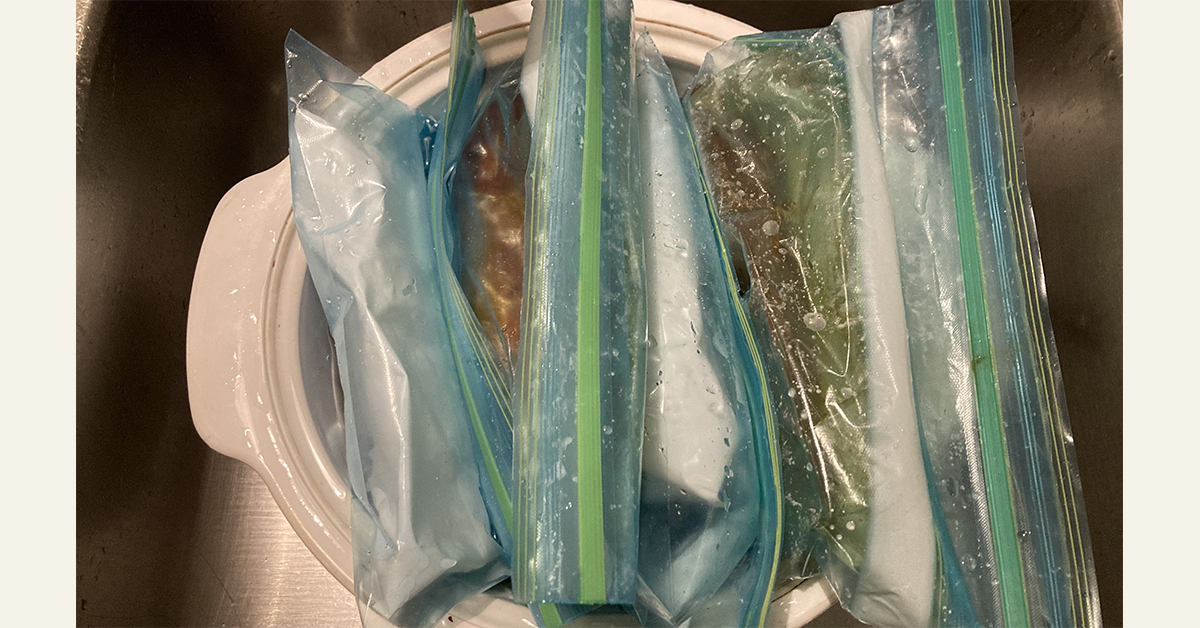
Showing how to cool food quickly

Two things about cooking a big batch of something. You need to get it in the fridge, and you need it to be cold when you put it in, otherwise the warm food will over-work your fridge and everything else will get warm.

Last night, while getting ready to pack up the tripe stew I made, I stumbled on a quick and easy way to do it!

I put the stew in baggies and set them back in the (now washed) pot. Between the baggies of stew I slid frozen gel-packs—the same kind you use to chill food when camping.

Then, remembering that air is an insulator and water is a conductor. This is why Jack died and Rose lived – the cold water lowered Jack’s core temperature quickly. Yes! There was room on the door! If he’s gotten out of that cold water he would have lived!

But we do not want anything to live in the food we are chilling, so faster is better. The water allows for faster equalizing of the temperature differential between the frozen gel-packs and the food, so the food drops to a refrigerator-able temperature nice and fast.

Instead of taking all night, the pot of tripe stew took a little over an hour.

Soul-Warming Tripe Stew is a Family Favorite

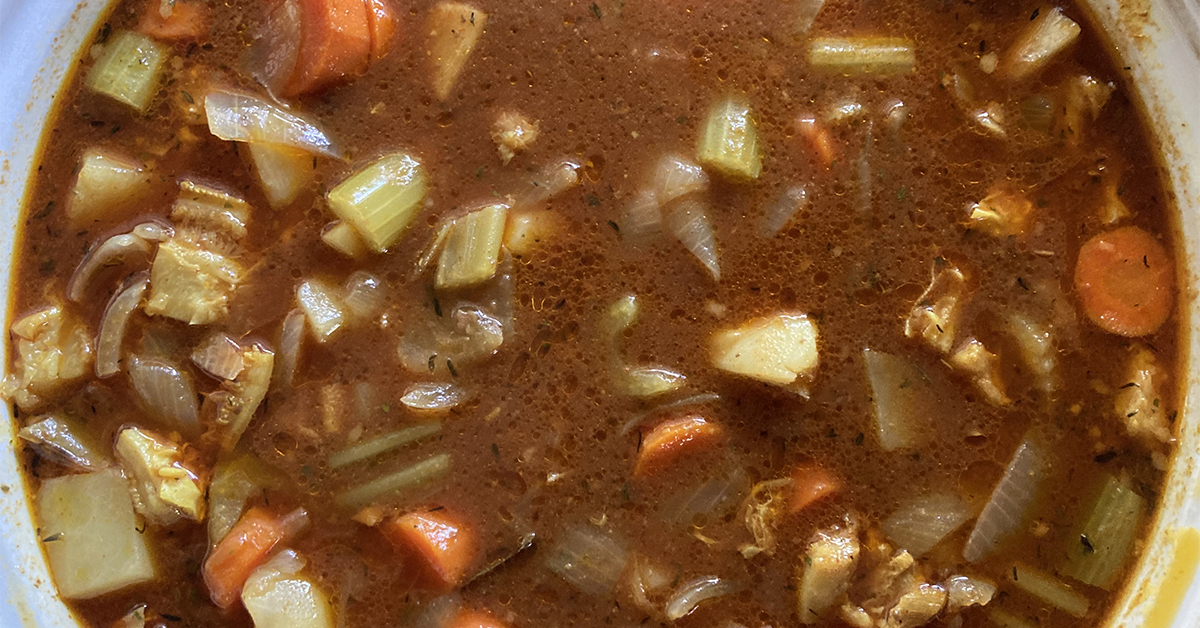
tripe stew

by Leilehua Yuen

I love tripe stew! My Stepmom, Sylvia, made awesome tripe stew which I always considered THE best. Then , when I married, my husband informed me that HIS mother’s was THE best. They both are excellent.

We also used to really enjoy the tripe stew that Ken’s House of Pancakes used to make back in the early 2000s.

My husband, Manu, and I met through motorcycles. I didn’t have a car at the time, and he preferred his bike to a car, so we both were daily riders. Commuting Hilo to Kona, plus just going holoholo, I was putting almost 1,000 miles per week on my little Honda Nighthawk.

Well, one time Manu and I had ridden up Mauna Kea. I was giving cultural programs at the Visitor Information Station. On the way back down the mountain, it was pouring! We were soaked! When he pulled up next to me at the stoplight at the bottom of Saddle Road, the Waiānuenue intersection by the gas station (this was before the realignment), we looked at each other, simultaneously said “Ken’s, tripe stew.” The light changed and we were off.

Much of our courtship was at Ken’s, and the staff always welcomed us, casting a proprietary eye on our doings. The security guard saw us coming, moved the traffic cones, and waved us in to “our” spot. We got off our bikes, shook off as much wet as we could, and headed in. They saw us coming and brought a pot of coffee to the table. “And what would you like, my dahlings?” “Tripe Stew!”

Circumstances will never again be such as to create the exact ambiance that made that night’s stew so exceptionally delicious. But I hope this version will be enjoyable in its own way.

Tripe Stew

Ingredients

  • 2 lbs tripe
  • 2 lbs soup bone (to make stock)
  • 2 round onions
  • 3 carrots
  • 3 stalks celery
  • 1 green bell pepper
  • 3 medium potatoes
  • 1 bulb garlic
  • 1 15oz can tomato sauce
  • 1 6oz can tomato paste

Seasonings
If using fresh seasonings, adjust quantity accordingly.

  • 3 small bay leaves
  • 1 teaspoon mustard powder
  • 1 teaspoon black pepper
  • 1 tablespoons dried thyme
  • 1 tablespoon smoked paprika powder
  • 1 teaspoon ʻōlena (turmeric) powder
  • 1 tablespoon dried parsley

The day before, start your soup bones cooking and make a nice rich beef broth. If you do not want to make your own broth, you can buy it in cans, jars, powder, or cubes. But I like home-made best. The easiest way to make the broth is to put the bones in a slow cooker, put in an onion and a couple of bay leaves, set the lid on it, turn to high, and leave it to cook overnight.

The next day: Rinse the tripe well in cold water. Cut it into bite-sized pieces. Place in a pot and cover with water, then set on the heat. Bring it to a boil and then simmer until just tender. I find it takes at least an hour, preferably two. As the smell of tripe can be strong, I like to put it in the slow cooker and set it outside on the lānai to cook so the house does not smell like tripe for days! In the slow cooker, I usually start timing while it is still cold, and plan for two-three hours.

While the tripe is cooking, I cut up the vegetables, more or less in bite-sized pieces. Crush or mince the garlic and add it to the vegetables. Using the fat rendered while cooking the broth, in a heavy pot cook the vegetables until just tender. Turn off the heat and set them set.

Strain the beef broth you made last night from the soup bones. Remove the bones and put the shredded meat back into the broth. Let it cool and skim the fat off.

When the tripe is just tender, pour it into a colander to drain, then rinse well with cool water. Place it back in a large pot and add enough of the broth to cover. Add the tomato sauce and paste. You can also add fresh tomatoes!

Let the tripe simmer until it is fully tender, probably another hour or so, and then add the vegetables. Cook until everything is as tender as you would like.

Serve with rice and chili pepper water.

Steamed ʻUlaʻula Koaʻe

ʻUlaʻula Loaʻe

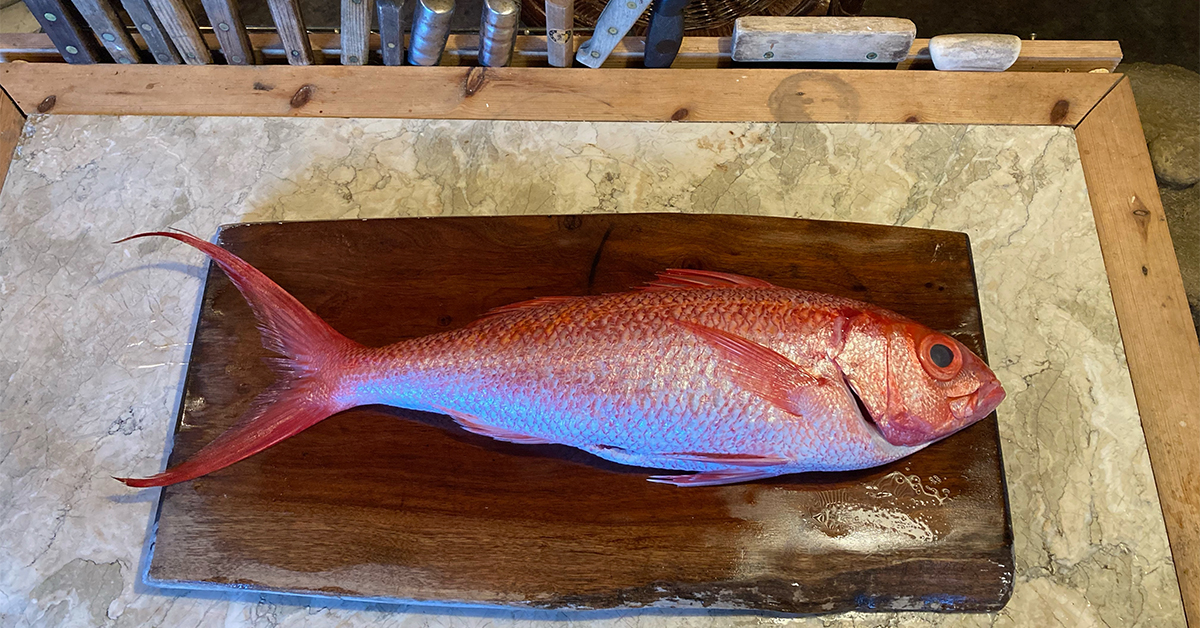
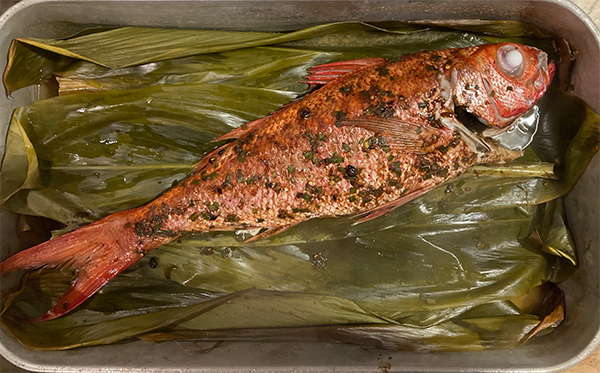
A friend gave us a five pound ʻulaʻula koaʻe last night. It had been caught that morning. I decided that I should cook it immediately, as it is rare to get such a magnificent fish so fresh. Unfortunately, I had not been shopping lately, so had few of my usual ingredients.

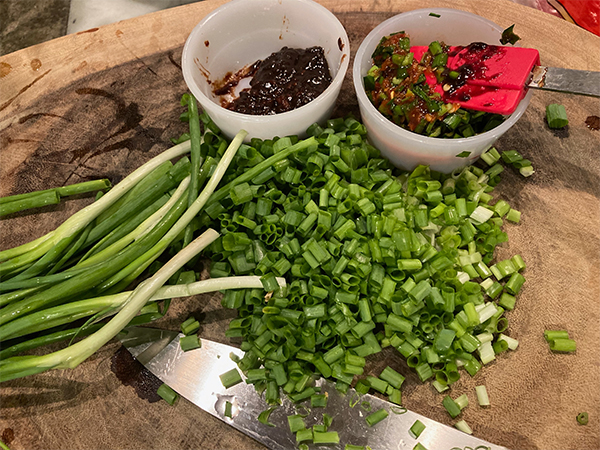
First stop was my garden, where I gut several spring onions and a handful of garlic grass. Then I rummaged about in the fridge and found a jar of black bean sauce and some garlic chili sauce, as well as some miso paste. I minced the onion and garlic grass and stirred as much as I could in to a 50/50 blend of the black bean sauce and garlic chili sauce.

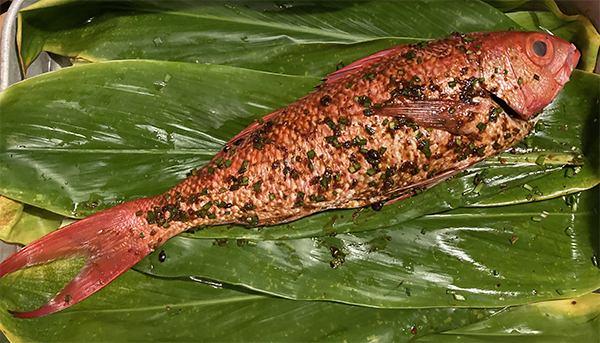
I stuffed the body cavity of the fish with the onions and paste. I also coated the skin with a thin layer.

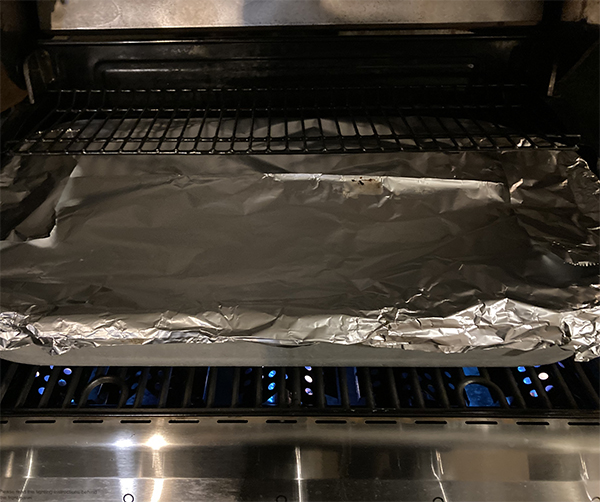
The roasting pan had miso broth in it for steaming the fish. While the miso does not really do much to the flavor of the fish, but the fish drippings make the miso outstanding! A rack was set in the pan, and then lāʻī (tī leaves) were laid on that. The fish was then covered with more lāʻī. Not having a lid for the pan, I covered it with aluminum foil to hold in the steam.

The fish and the pan were far larger than my little convection oven, so I put it in the big grill on the lānai. It cooked for about 45 minutes at 350℉.

It was moist and tender, delicately flavored with the black bean, onion, and garlic, with a hint of heat from the chili paste. We enjoyed it very much. The minced spring onions in the body cavity were a perfect condiment.

I saved the head, tail, and fins to deep fry for snacks tomorrow.

Cooking Home-Raised Tilapia and Using the Leftovers

Baked Tilapia

by Leilehua Yuen

My Dad has been raising tilapia the past few years, and decided it was time to harvest. Being the recipient of four lovely fish, I had to try some recipes.

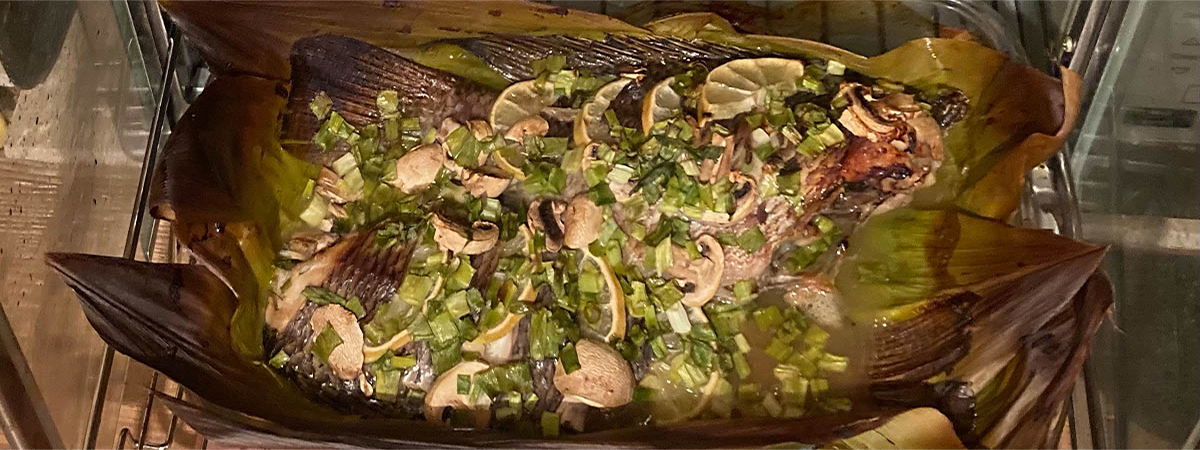
Dad gave me the fish already cleaned, so preparing them was easy-peasy. I cut some lāʻī and laid them in a baking dish. I slashed the top side of the fish and inserted slices of lemon. The leftover syrup from making candied ginger was poured over the fish, and it was baked about 15 minutes. I then covered it in mushrooms and minced green onions and added a bit more of the ginger syrup, then baked it about 20 minutes more.

Tender white flesh, it was quite good!

I served it with hōʻiʻo salad.

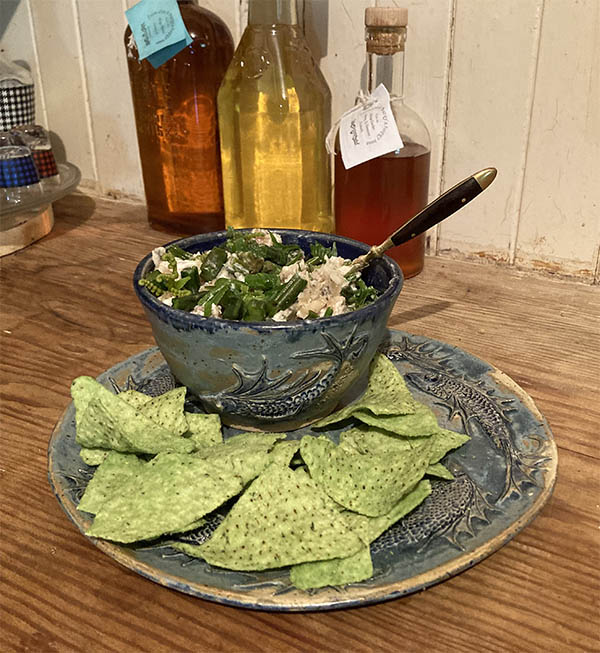
Tilapia Salad in lunchware by Geraldine Duncann

I removed the bones from the fish we did not eat and broke it into smaller pieces, then added the remaining hōʻiʻo salad. Enough mayonnaise to stick it together, and served with tortilla chips. It also would make a great salad!

I’ll add more recipes next time Dad gives me more tilapia!

Poke – How to make this traditional Hawaiian dish

Poke, Hawaiian raw fish dish

by Leilehua Yuen

According to the Hawaiian Dictionary (that one descended from the inimitable research of Pukui and Elbert), poke [POH kay) is:

nvt. To slice, cut crosswise into pieces, as fish or wood; to press out, as the core of a boil (Kam. 64:105) or the meat of an ʻopihi shell; section, slice, piece. Poke heʻe, a severed portion of octopus; fig., a chubby person. Poke ʻina, the tongue-like meat found in the ʻina, sea urchin; to remove this meat.

Nā Puke Wehewehe On-line Dictionary

Hawaiian people have been preparing poke as long or longer than we have been Hawaiians! While these days, the favorite main ingredient is ahi, there are MANY fish and shellfish one can use. Ahi, aku, mahimahi, heʻe, and mūheʻe, as well as various kinds of crab, muscles, and even tofu for a vegetarian poke.

There are as many recipes for poke as there are Hawaiian who make it, and then some, as each person probably has at least half a dozen favorite ways to prepare this Hawaiian staple. Here are some of my own favorites.

TIP: It’s easier to cut the fish if it is very cold, even soft-frozen.

Old-School Poke

This recipe comes from Hanapēpē about 1850. Onions, chilis, and tomatoes were introduced by immigrants, such as the New England whalers and missionaries, who settled in Hawaiʻi.

Mix together:

  • 1 pound fish cut into 1/2 inch cubes
  • 1/4 cup inamona* [ee-nah-MOH-nah]

Mince fine:

  • 4 stalks green onion
  • 2 Hawaiian chili pepper
  • 1/4 cup limu kohu, tightly packed
  • 1 red tomato

Mix with the fish.

Add to taste:

  • ʻalaea [[ah-lah-EH-ah] salt (red Hawaiian salt)

For true old style, save the blood, liver, and nāʻau (guts) from the fish, mince well and salt to taste. Mix thoroughly with the poke. But probably not a good idea in this day and age.

Basic Poke

This is a recipe for basic poke. It was the favorite of my grandparents. My grandfather ate this style since he was a little boy in Hanapēpē, Kauaʻi, so it dates from 1900 or earlier.

  • Ahi [AH hee] (Thunnus albacares) or other fish
  • Hawaiian salt or rock salt
  • Limu kohu [LEE moo KOH hoo] (Asparagopsis taxiformis)
  • Inamona*
  • Ice cube

Cut the ahi in 1″ square cubes. Add the salt and limu to taste. Add an ice cube, about one cube per two cups of poke, to chill and add moisture. Cover tightly and refrigerate at least an hour to miko [MEE koh], to develop the flavors, before serving.

Poke ʻAkiʻaki

This is an old-school recipe that I learned in Hilo around 1970. We were having supper at the home of friends, and as one of the kids I was invited to kōkua [koh KOO ah], to help, in the kitchen. This is the style of poke they made.

  • Ahi [AH hee] (Thunnus albacares) or other fish
  • Hawaiian salt or rock salt
  • Limu kohu [LEE moo KOH hoo] (Asparagopsis taxiformis)
  • green onions
  • Nīoi [nee OH ee] (Hawaiian chili pepper)
  • Boiling water
  • limu ʻakiʻaki [LEE moo ah kee AH kee] (Ahnfeltia concinna) – optional
  • Ice cube

First, place the limu ʻakiʻaki in a colander and place the colander in a large bowl. Pour the boiling water over it to soften the limu. Let it sit in the hot water a few minutes until somewhat tender, then mince. While the limu ʻakiʻaki is softening, cut the fish into 1″ square cubes and mince the limu kohu, green onions, and nīoi. Mix everything together. When the limu ʻakiʻaki is soft, add it to the mix. Add an ice cube, about one cube per two cups of poke, to chill and add moisture. Cover tightly and refrigerate at least an hour to miko [MEE koh], to develop the flavors, before serving.

Poke Kepani (Japanese-style Poke)

This version, being a little more complex, gets measurements to give you a starting point. Adjust to taste.

  • 1 lb Ahi [AH hee] (Thunnus albacares) or other fish
  • 2 Tblsp shoyu
  • 1 Tblsp sesame oil
  • 1 Tblsp white sesame seeds
  • 1/4 cup minced green onion tops
  • 1/4 cup minced ogo
  • boiling water
  • Shoyu to taste if needed

First, place the ogo in a colander and place the colander in a large bowl. Pour the boiling water over it to soften the seaweed. Let it sit in the hot water a few minutes until somewhat tender, then mince. While the ogo is softening, cut the fish into 1″ square cubes and mince the green onions. Mix everything together. When the ogo is soft, add it to the mix. If needed, add more shoyu to taste. Cover tightly and refrigerate at least an hour to miko [MEE koh], to develop the flavors, before serving.

Poke Kōlea (Korean-style Poke)

  • 1 lb Ahi [AH hee] (Thunnus albacares) or other fish
  • 2 Tblsp shoyu
  • 1 Tblsp kim chee liquid
  • 1/4 cup roughly chopped kim chee
  • 1/4 cup minced green onion tops
  • Hawaiian salt or rock salt to taste

Cut the ahi into 1″ cubes and mix with the remaining ingredients. Chill for at least an hour.

Vegan Poke

You can easily substitute tofu for the fish in any poke recipe to make a vegetarian or vegan version. Some people even lightly fry the tofu first to give it a bit of a skin to create a more substantial mouth feel.

* ʻInamona [ee-nah-MOH-nah] is a relish made from the kernel of the kukui nut. Possibly it is a contraction of ʻīnaʻi momona, sweet garnish.